Sunday, February 15, 2015

Ivory/Cream at The Ribbon Girl Colour Challenge


 Happy Valentine's Day everyone! I hope you all had a very lovely day.
Today starts a new Colour challenge over at The Ribbon Girl blog and our theme this month is 'Ivory/Cream'.
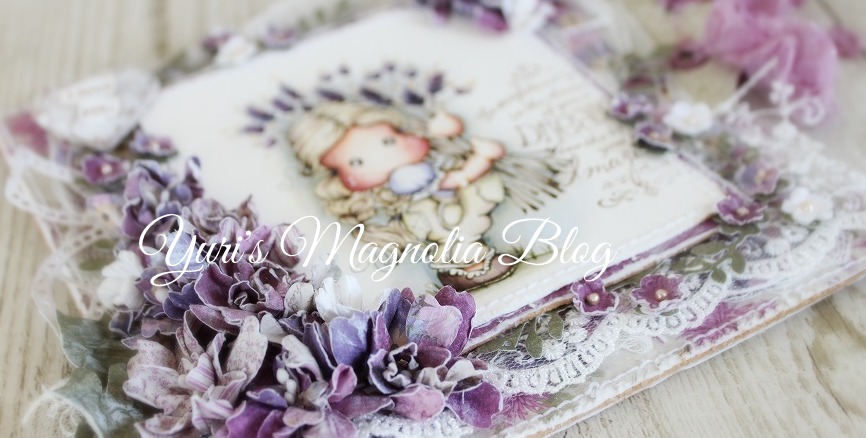
I thought it would be fun to create a vintage photograph effect by colouring the images in sepia tones for my card.


I've used I Give You My Heart Tilda Duo and the kitty coloured in Sepia using Distress inks Antique Linen, Vintage Photo & Walnut Stain. I coloured only the heart in red using Aged Mahogany and a little bit of Black Soot to shade. 
I absolutely love him which is called Napoleon from Magnolia's Animals Of The Year Collection 2014. Don't these two look so cute together?

For my tag, I've used Romantic Tag and stamped coordinate text stamp from I Give You My Heart Tilda Duo on it. 


This is the list of the lovely materials from The Ribbon Girl I used:
55mm Emma Ivory Guipure Lace, 12mm 'Amanda' Ivory Scallop Flat Lace, Rose Bud Terracotta/Rust with One Leaf, Burgundy 20mm Open Roses, Ivory 30mm Wild Roses, Rolled Paper Flowers - Ivory Roses Kort & Godt, Wren Bird Charm Bronze, White No 80 Gutterman Top Stitch Thread,  Natural Hemp Twine, 5mm Pearls Ivory Self Adhesive, 5mm Red Pearl Self Adhesive, 11mm Pearl Ivory Flat Backs.


Supplies: 
Stamps: I Give You My Heart Tilda Duo - Lovely Duo Collection 2015
Napoleon - Animals Of The Year Collection 2014
New York (post mark): With Love Collection 2013
Postcard from Paris - Stempelglede 

Dies: DooHickey Club #3 Oh La La - Magnolia, Polynesian Sails Oval - Cheery Lynn, Large Frame Frilly #4 - Go Kreate
Paper: Something Old, Shoe Ornament - Magnolia
Medium: Distress ink reinkers, Liquid pearls bisque, White gesso


I hope you like it and I've inspired you to join us @ the challenge. Pop over to the blog to see the rest of the team's stunning creations. 

Okay, that's all for today. Thanks for stopping by. 
I hope you all have lots of love in your life every day, not just on Valentine’s Day <3

XOXO Yuri


Wednesday, February 4, 2015

How to make flowers using DooHickey's dies


Hi everyone! I would usually post a card, however today's post is a little different. Today I am sharing with you how to make flowers that I made for Magnolia DooHickey Club vol.2. These flowers are made with Mulberry paper and Magnolia's DooHickey dies - Peony Petals.


To make flower you will need (per 1 flower): 2 large Peony Petals, 2 small Peony Petals, Mulberry paper, Distress inks, Heat tool, Sponge dauber, Mister filled with water, Adhesive, Pearl or Brads.


Step 1: Die cut mulberry paper using Peony Petals, and colour with Distress inks using a sponge dauber. They colours are a mix with Victorian Velvet, Spun Sugar and Worn Lipstick.


Step 2: Spray water on the petals with a mister and make the whole petals wet.


Step 3: While the petals are wet, tear the edge of petals with your fingers as shown in the picture.


Step 4: Dry them using your heat tool.


Step 5: Before they dry, form the shape with your fingers or tools as you like, then dry them completely.


Step 6: Assemble 2 large petals and 2 small petals together and glue the centre of petals.


Step 7: Adhere them with a pearl or brads to the centre.


Step 8: To decorate your box, you will need: 1 sash (using DooHickey’s Old Swedish Lace), 3 flowers, 2 tags (using DooHickey’s Tea label Tags and A Joyful Christmas (Text) - Magnolia Winter Wonderland 2013), 3 snowflakes (using DooHickey’s Snowflake Kit),  1 star (using DooHickey's Tea Label  Shapes, I heat embossed with gold embossing enamel and gold glass glitter), Tulle lace, Twine, Adhesive, Paper (Magnolia).


Step 9: Tie the tulle lace around your gift box, and put the tags and a sash.


Step 10: Adhere the snowflakes, the star and the flowers on the sash.


You're all done! This flower would be perfect for a gift topper, a hairclip, a corsage, a bouquet or a girly napkin ring etc.


♥.. ♥


For an envelope:


DooHickey dies : Lace Coaster, Pink Vintage Photo Frames, Tea Label Shapes(Star)
Stamp: Merry Christmas (text) - 2013 Winter Wonderland Collection
 Paper: Pion


For a gift bag:


DooHickey dies: Snowflake Kit, Christmas Tags, Barn Window, Tea Label Shapes(Star)
Stamps: Pixie Tilda, A Joyful Christmas (text) - 2013 Winter Wonderland Collection
 Paper: Magnolia


I hope you will enjoy the tutorial as much as I have enjoyed making them!

♥ Yuri ♥


*アメブロにて日本語バージョンを掲載します。


Tuesday, February 3, 2015

Loves Me Loves Me Not Tilda Duo


Hi everyone! Today I would like to share a card using three stamps of Magnolia.

She is called Loves Me Loves Me Not Tilda Duo from Lovely Duo Collection 2015. I have masked over her and stamped Cute Magnolia from Little London Collection 2013 and Puppy Love Wiola from Winter Wonderland Collection 2013 together. These images are so cute to use together to create a scene!


Loves Me Loves Me Not Tilda Duo - Lovely Duo Collection 2015


Cute Magnolia - Little London Collection 2013


Puppy Love Wiola - Winter Wonderland Collection 2013


DooHickey's dies: Round Talk Thought Bubbles, Leaf & Swirl, Tilda Tag, DooHickey Club #2
Dies: Go Kreate Large Frame Frilly #13
Colouring: Distress reinkers
Paper: Maja

I stamped cordinate text on a tought bubbles die cut using DooHickey's Round Talk Thought Bubbles. 


This is the list of the lovely materials from The Ribbon Girl:
Princess Pin Blue, 23mm Daisy Guipure Pale Ivory, 12mm 'Amanda' Ivory Scallop Flat Lace, Ivory 20mm Open Rose WOC, Mocha 20mm Open Rose, Pale Pink 20mm Open Rose WOC, 5mm Pearls, Ivory Self Adhesive, 3mm x 5mm Oval Ivory Pearl String, Beaded Stamen White/White, Cheesecloth.


Thank you for stopping by!
I will be back soon with something else to share with you .. Bye for now.

Yuri